Paper Prototyping
(also known as "rapid prototyping")
The next stage of prototyping helps you rapidly build out an idea and gather constructive feedback from users. Most people jump to the computer at this stage, but prototyping on paper first has a number of advantages:
- Prototyping on paper first gives you an opportunity to gather feedback from users before you deeply invest in creating something. This means you will be more likely to accept critical feedback and adjust your plans.
- Paper prototypes can help you identify what is most challenging, and most effective about your designs, which will help with the next stages of the planning process.
- And, paper prototypes help you focus on your design, before you have to start worrying about technical challenges!
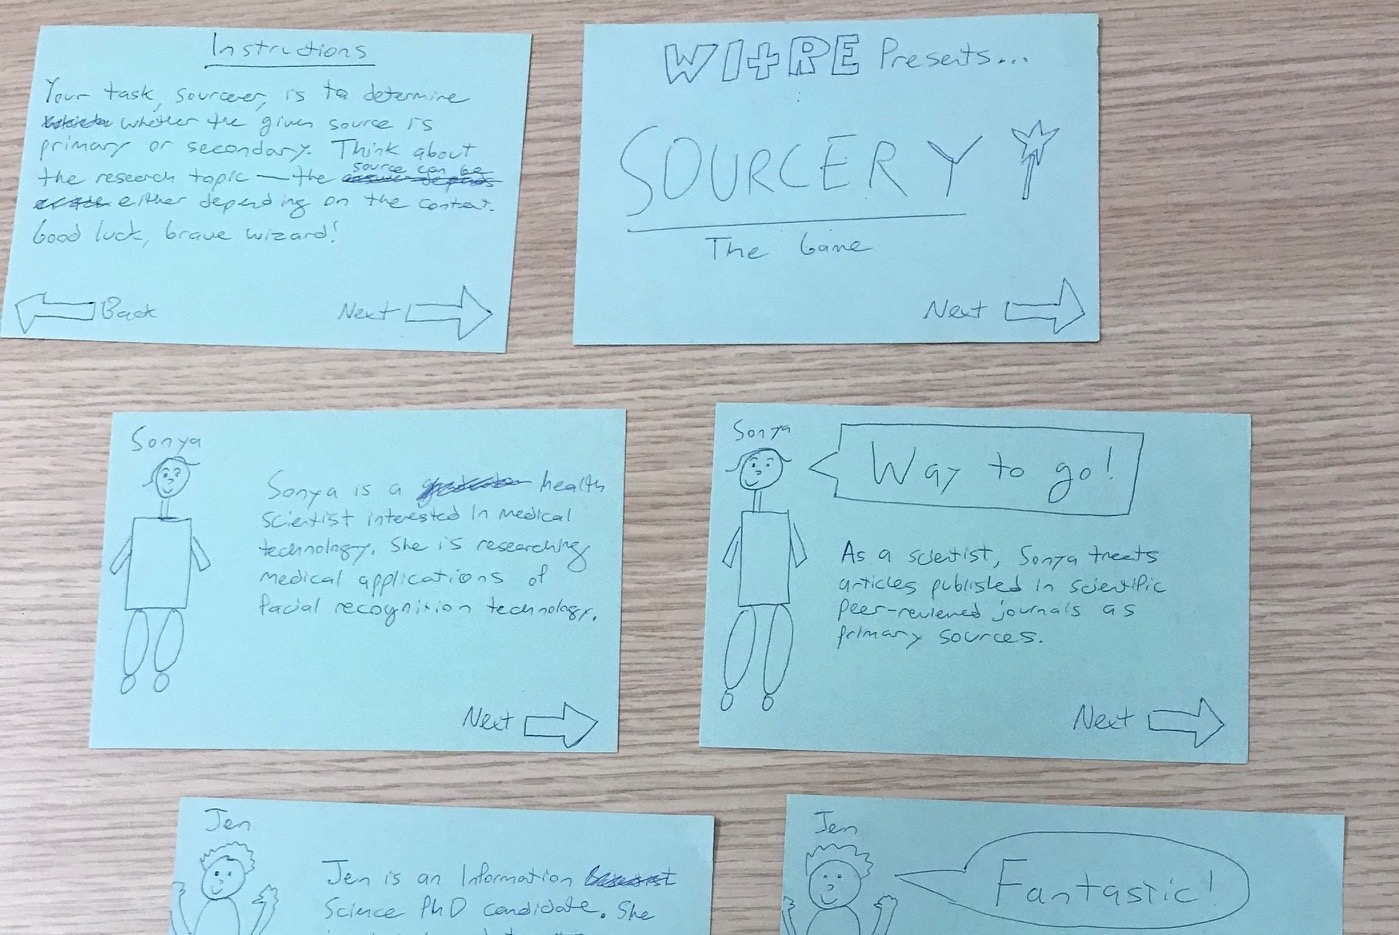
These index cards are an early paper prototype of an interactive online game on primary and secondary sources. Doing user testing with the paper prototypes helped the designers get feedback on their ideas early in the design process.
Creating paper prototypes
- Get a large stack of index cards and large sheets of paper.
- Select your favorite "path" from the 4 paths prototyping activity.
- Working individually, work for about 15 minutes to create storyboards for your favorite path. If you are creating something like a handout, or a poster, use the large sheets of paper to rapidly sketch out possible ideas. If you are creating videos or interactive tutorials, use the index cards. Each index card should be a "scene" with a sketch at the top of what the learner will "see" and a transcript at the bottom of what the learner will "hear."
- Come back together as a team to talk about the paper prototyping process. How did it feel to rapidly create prototypes? What are the benefits and challenges of working on paper first?
Improve this page